Getting Started
What is LTI®
LTI®, which stands for "learning tools interoperability", is a standard for integration of rich learning applications within educational environments. Within the standard, there are many protocols and versions of protocols. The most popular of which is LTI® 1.3.
Implementing the LTI® 1.3 protocol and all of it's services can be a very difficult, time consuming task, but using LTIAAS any project can be easily turned into a fully LTI® 1.3 compliant learning tool, with minimal alterations to the project's codebase.
Who we are
LTIAAS was founded with the goal of dramatically decreasing the complexity of implementing the LTI® protocol. LTIAAS is not affiliated with 1EdTech Consortium, Inc.
What we do
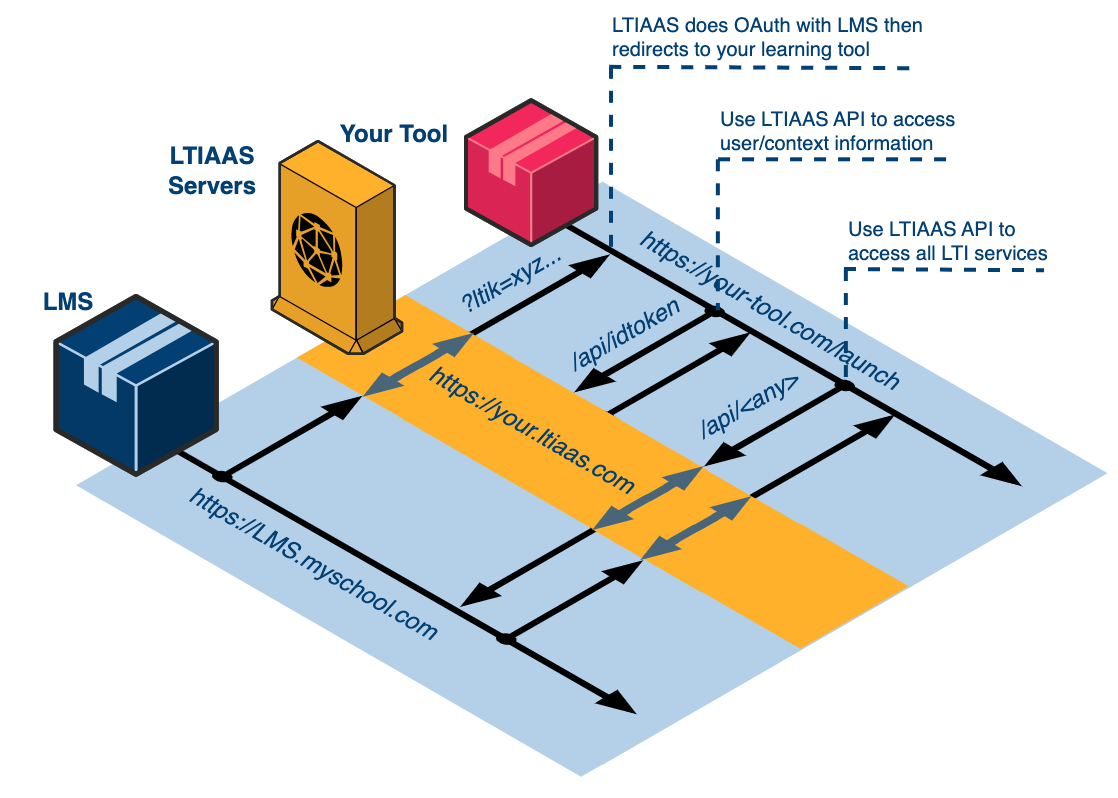
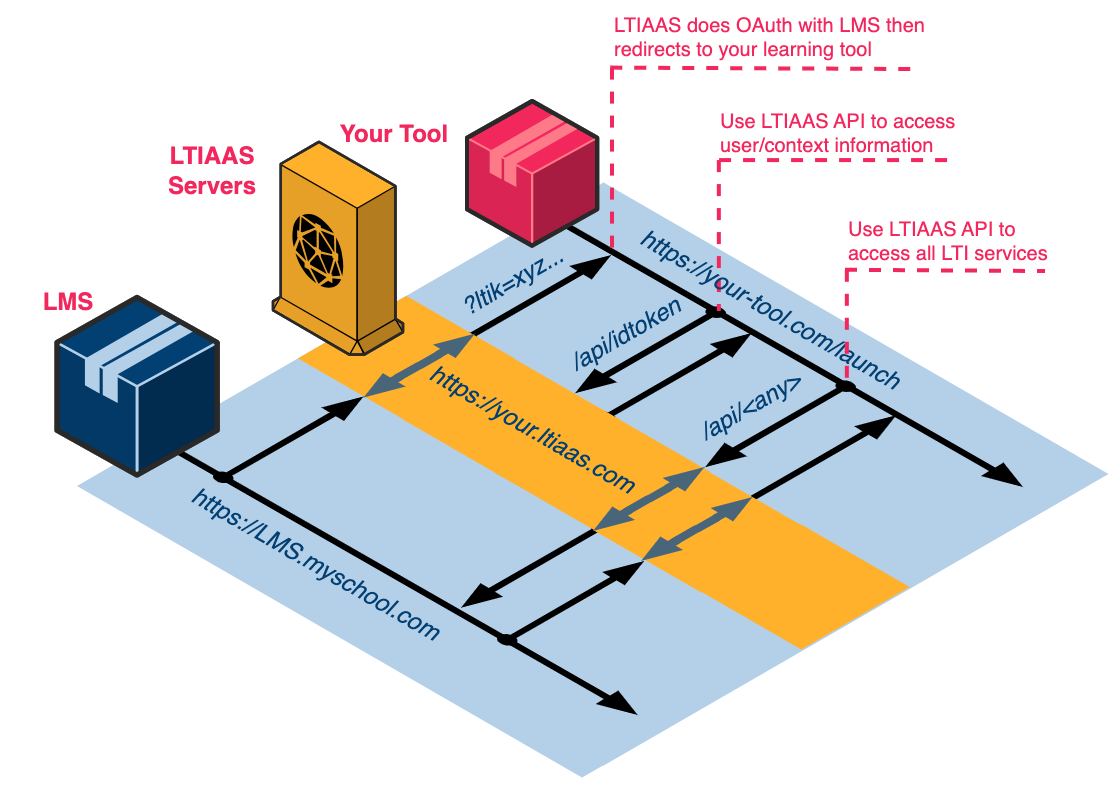
LTIAAS works as a middleman between your application and any LTI® compliant LMS, handling all of the communication and giving you access to a powerful API that allows you to take advantage of the various LTI® functionalities, like grade manipulation and roster retrieval.
Section summary
This guide will walk you through the steps of setting up your free LTIAAS account and getting your very first LTI® integration up and running withing minutes.
📄️ Account Setup and Deploy
How to set up your account and deploy your LTI® tool.
🗃️ LMS Setup
6 items
📄️ Receiving your first launch
What to do after receiving your first launch.
Next steps
You can start building your LTI® integration by creating a free LTIAAS account. Please see the Account Setup and Deploy guide for more information.